How to create a Minecraft server using our API
When it comes to creating a Minecraft server you have a lot of choices, but only one offers a public REST API - in this article we'll be explaining how to create your Minecraft server programatically using the ServerFlex API.
If you host a Minecraft community, run tournaments/mini-games or just want to automate your Minecraft hosting deployments, it's likely you have are looking to create your Minecraft servers using an API (Application Program Interface) - ServerFlex is the only platform in the world to offer an easy-to-use API for Minecraft server hosting and we offer a huge variety of server versions (including Forge, PaperMC, Tuinity, FTB and may more). At the end of this article we will also compare the experience of trying to automate deployments with the AWS, Vultr and DigitalOcean APIs.
How do I deploy Minecraft using ServerFlex's API?
First you should head over to the Developer Documentation for ServerFlex and scroll to the example for How to create a Minecraft server. To use the ServerFlex API you will need two things 1) an account with billing information setup and 2) an API key for your account. If you need to setup either of these click here or scroll to Authentication in the documentation.
For this example we will be using Postman to create and send the requests to the ServerFlex API, but you could use any HTTP library or even the ServerFlex API client libraries to do the same thing.
Step 1 - Check your keys are working.
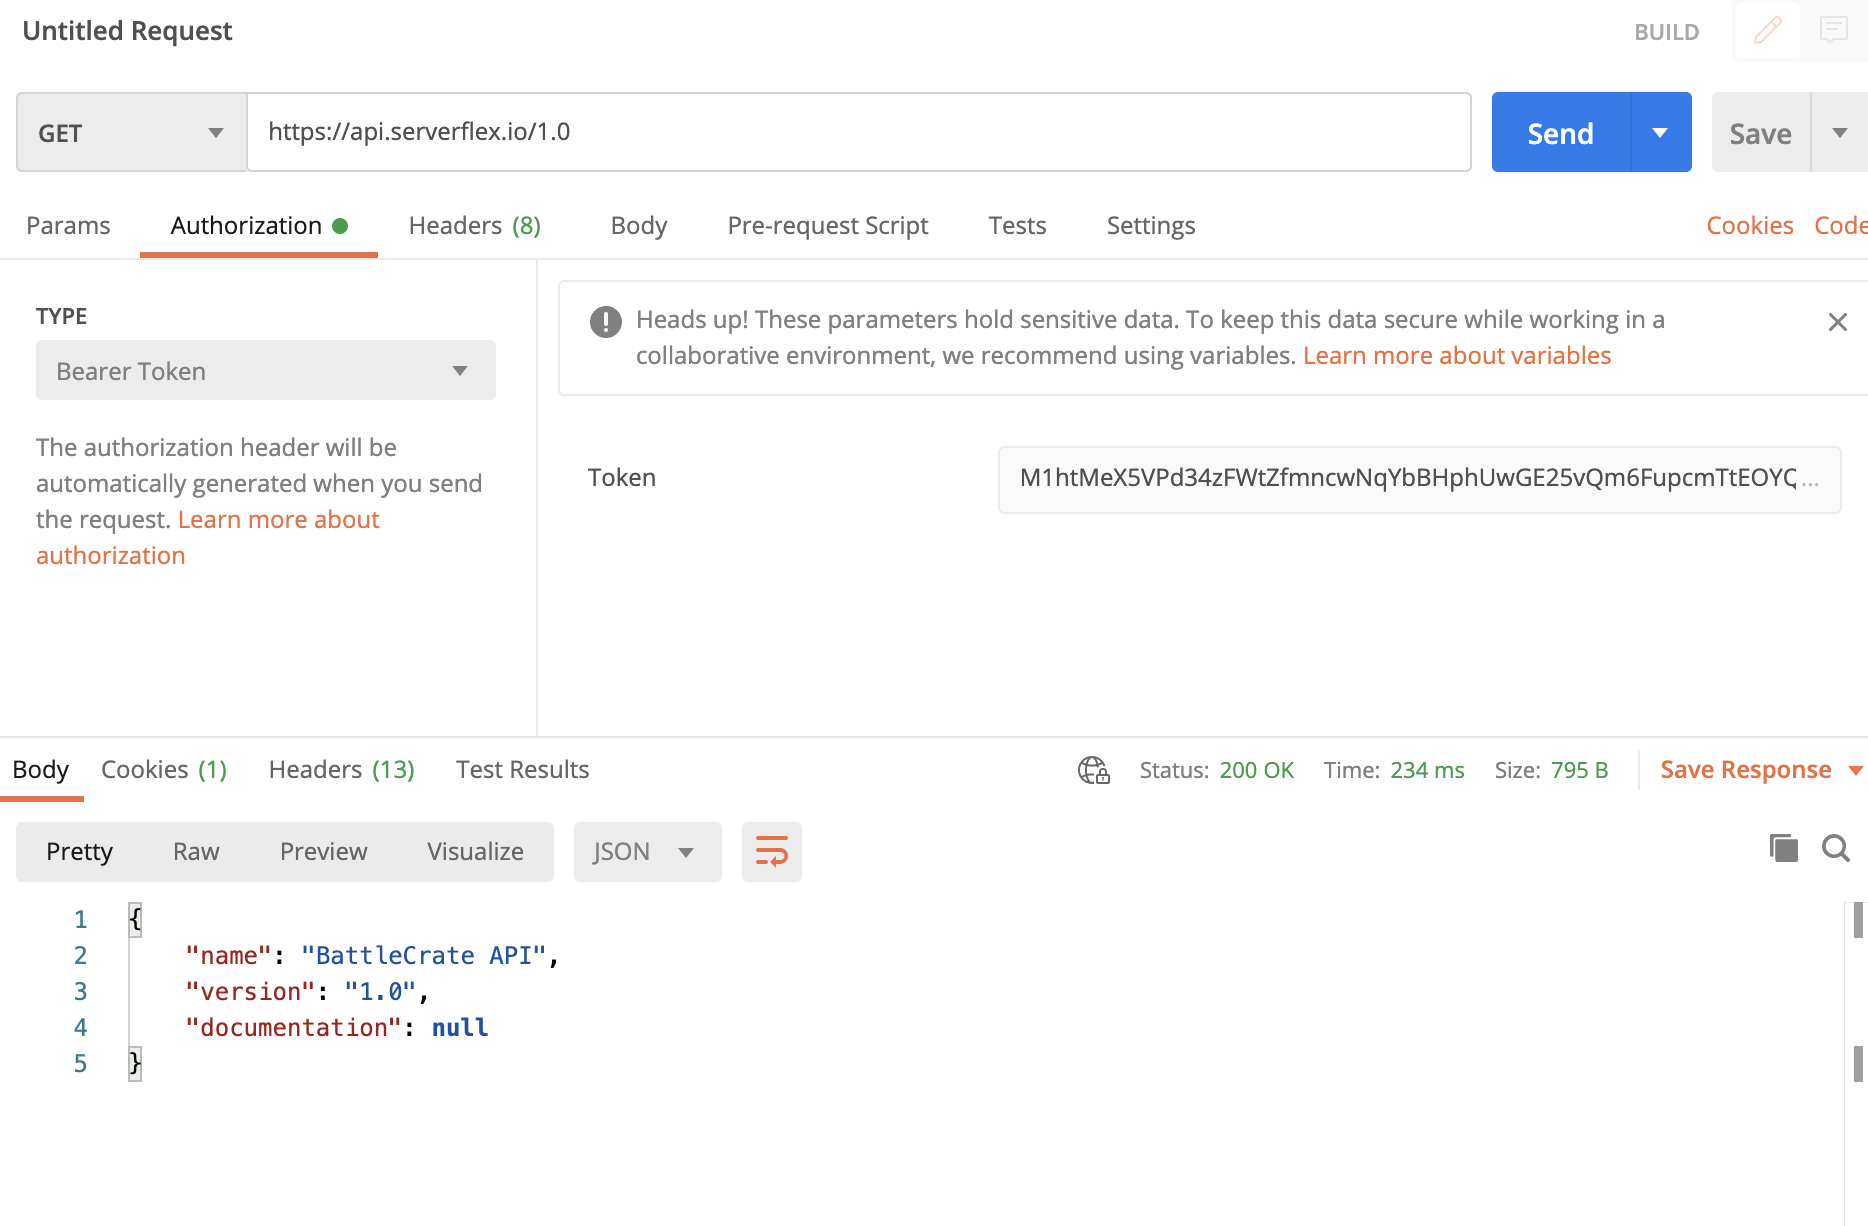
Before we get started we need to ensure our API key is working. Your key must be added as a Bearer token (using the Authorization header). To validate your key is working make a GET request to https://api.serverflex.io/1.0/ - if your key works you will get a 200 response from this route.
Step 2 - Get the supported Minecraft versions and available plans
ServerFlex supports almost every kind of Minecraft you can imagine out of the box, to determine if the desired version is supported you need to make a GET request to https://api.serverflex.io/1.0/package/minecraft. This route will also return all of the available plans for a Minecraft server - plans determine the cost, CPU allocation, RAM, Storage and Backup allowances. The response from this route will look something like this:
{
"displayName": "Minecraft",
"name": "minecraft",
"plans": [
{
"displayName": "Grass",
"name": "mc.grass",
"pricing": {
"costHourly": 0.04,
"costMonthly": 4.0,
"currency": "GBP"
},
"resources": {
"backupsInMB": 30000,
"cpuCount": 2.0,
"memoryInMB": 1024,
"storageInMB": 15000
}
}
],
"runtimes": [
{
"aliases": {
"latest": "1.16.4"
},
"displayName": "Vanilla",
"name": "vanilla",
"versions": [
{
"displayName": "1.16.4",
"name": "1.16.4"
},
{
"displayName": "1.16.3",
"name": "1.16.3"
}
]
}
],
"regions": [
{
"country": "U.K.",
"city": "London",
"name": "uk-1"
},
{
"country": "Germany",
"city": "Munich",
"name": "germany-1"
},
{
"country": "US East",
"city": "Ashburn",
"name": "usa-1"
},
{
"country": "US West",
"city": "Phoenix",
"name": "usa-2"
}
]
}
In this response you will see Plans, Runtimes and Regions - many more will be returned in the response you get back from this request, we have truncated many for simplicity. The regions are physical locations around the world you can setup your server. Look inside the runtimes and find the version you would like to setup. For this example we are just going to setup a Vanilla 1.16.4 server.
Step 3. Build and make your request
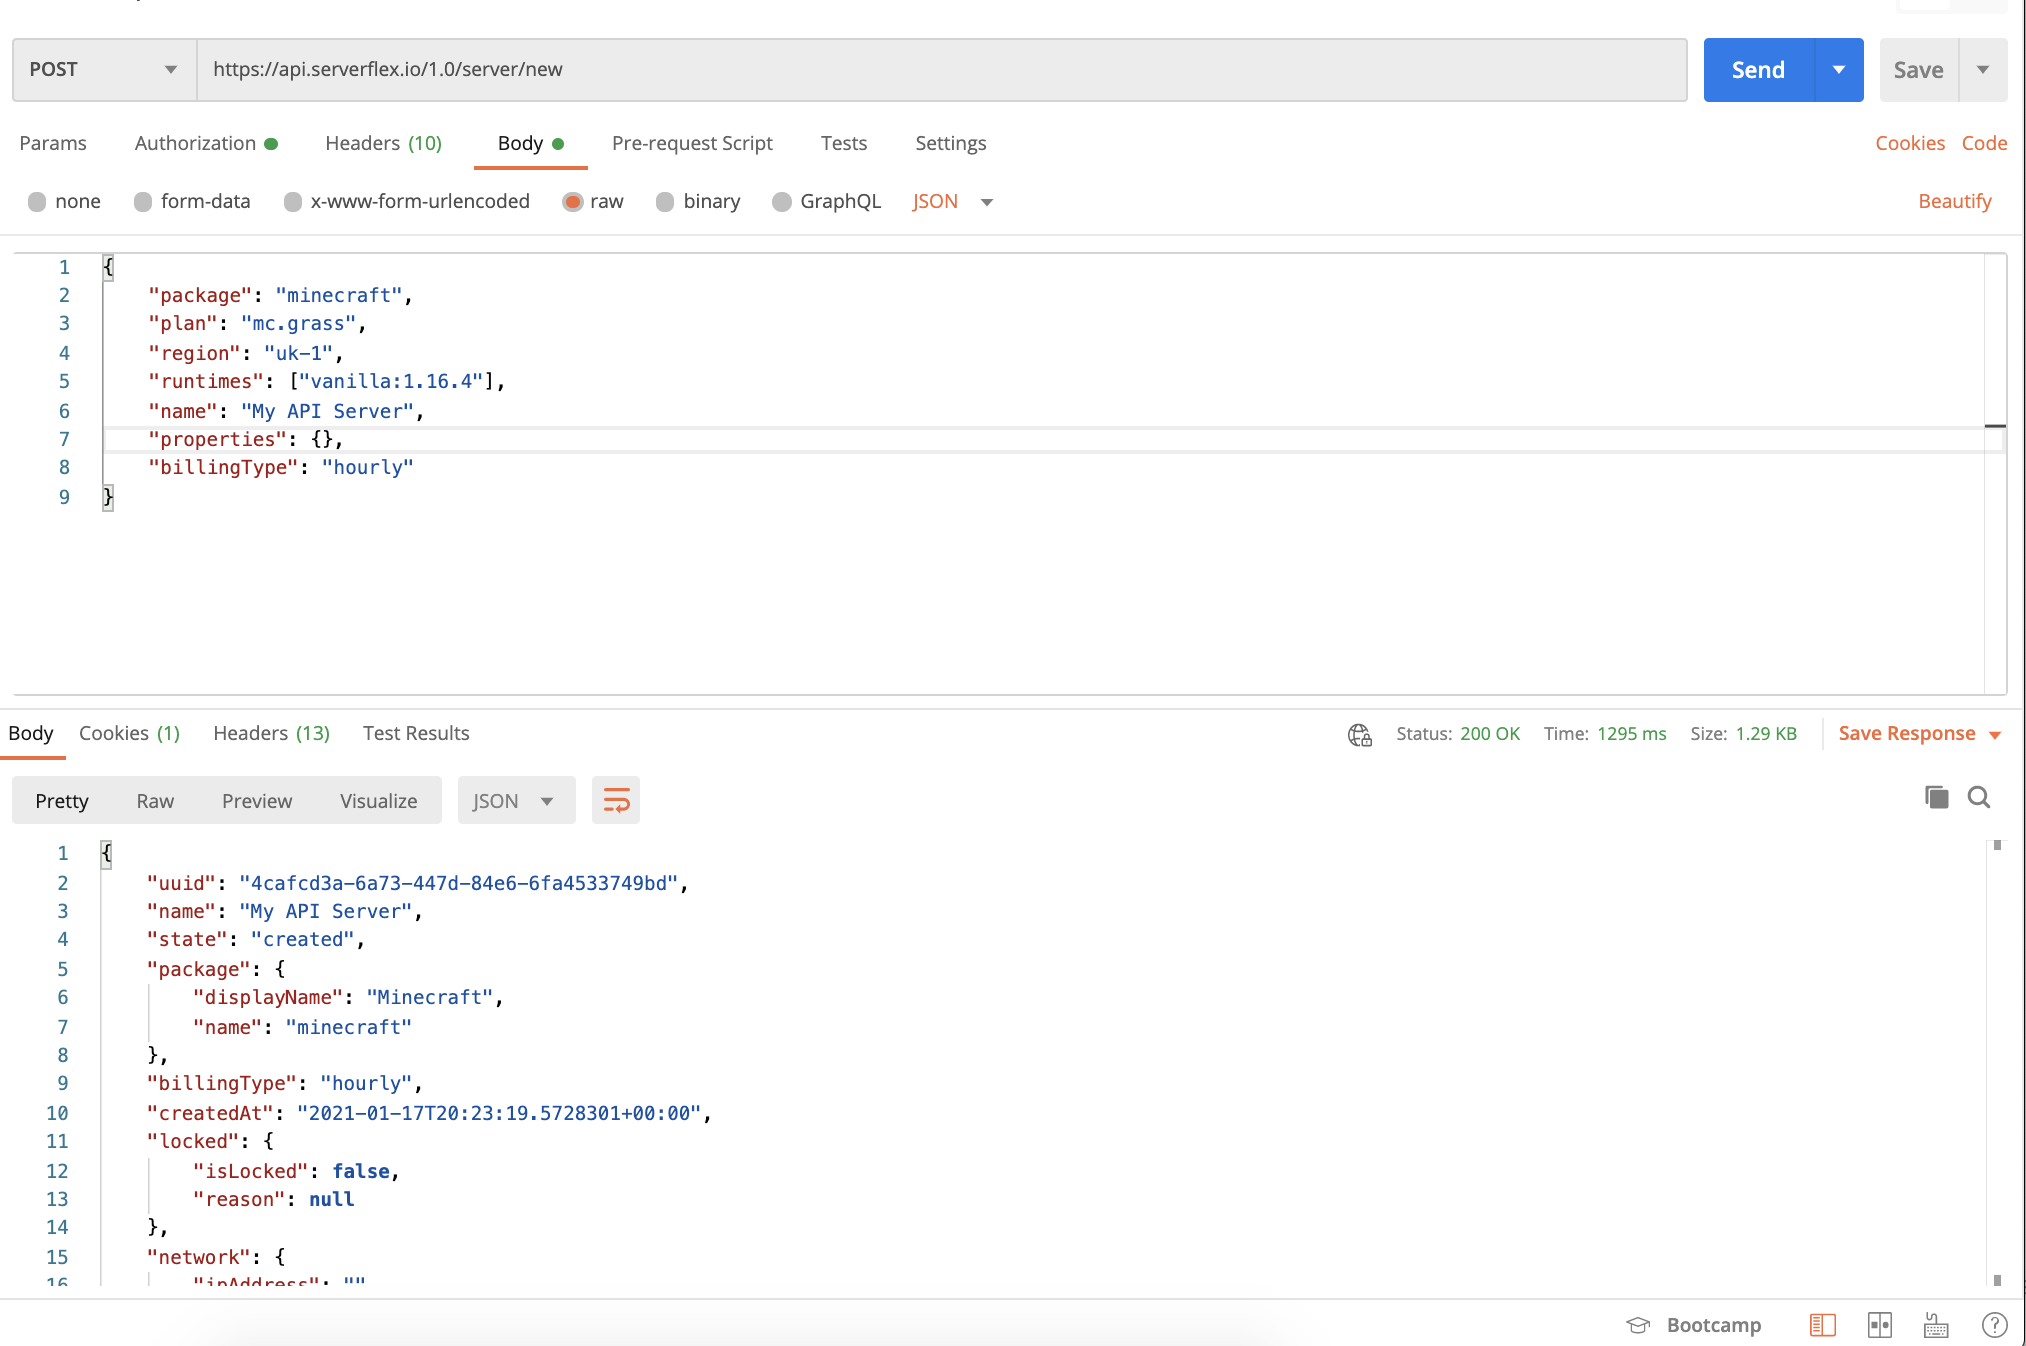
We now have everything we need to setup our Minecraft server with an API request - let's put the request together. We'll be making a POST request to https://api.serverflex.io/servers/new with a JSON body. Use the example below to create your own request:
{
"package": "minecraft",
"plan": "mc.grass",
"name": "My new Minecraft server",
"region": "uk-1",
"properties": {},
"runtimes": ["vanilla:1.16.4"],
"billingType": "hourly"
}- The "package" field is the game you would like to play - so enter "minecraft".
- The "plan" field is the name of the plan to use (from the previous request)
- The "name" field is the name of the server, this is to help you identify the server in your account.
- The "region" field is the name of the region to provision this server in.
- The "runtimes" field is where you supply the version of Minecraft you would like to plan, we are playing Vanilla, so we enter the "name" field from the previous request for Vanilla (vanilla), a colon and then the "name" field for the version we would like to deploy. (This would be "vanilla:1.16.3" to deploy 1.16.3 Vanilla)
- The "properties" field can be left blank.
- The "billingType" field is where you can specify if this server should be billed each hour ("hourly") of if you want to pay for it each month ("monthly").
Send that request, and if everything is valid you will receive a response like the one below:
{
"uuid": "86c14361-30b1-4729-8182-2920d5169a5e",
"name": "My API Server",
"state": "running",
"package": {
"displayName": "Minecraft",
"name": "minecraft"
},
"billingType": "hourly",
"createdAt": "2021-01-17T15:18:49.8286909+00:00",
"locked": {
"isLocked": false,
"reason": null
},
"network": {
"ipAddress": "51.195.164.12",
"ports": [
{
"name": "game",
"port": 25565,
"protocol": "tcp"
}
],
"subDomain": "2bs9dh4p.crate.pw"
},
"permission": "owner",
"plan": {
"displayName": "Grass",
"name": "mc.grass",
"pricing": {
"costHourly": 0.04,
"costMonthly": 4.0,
"currency": "GBP"
},
"resources": {
"backupsInMB": 30000,
"cpuCount": 2.0,
"memoryInMB": 1024,
"storageInMB": 15000
}
},
"region": {
"country": "U.K.",
"city": "London",
"name": "uk-1"
}
}
Congrats! You have just created your first Minecraft server programatically using the ServerFlex API; your server is ready to play, all you need to do is connect to the IP/subdomain that can be found in the network information.
ServerFlex is by far the simplest and most cost effective to use, all you need to do is perform two API requests and you new Minecraft server hosting will be setup in less than 10 seconds anywhere in the world!
What about creating a Minecraft server on AWS, Vultr or DigitalOcean?
Unlike the aforementioned companies, ServerFlex is purpose built for hosting your favourite games, that is why our API only requires two requests to create your server. ServerFlex abstracts all the complexities of networking, file access and permission management into one simple to use platform.
You can create your own servers on AWS Lightsail, DigitalOcean Droplets or Vultr Instances but this process is incredibly complicated and time consuming. We tested it - in our test the fastest we could deploy a Minecraft server on AWS was two minutes; compare that to ServerFlex guarantee of ten second deployments. With AWS especially you have to perform a huge amount of configuration before you can deploy your server.
Just like AWS, Vultr and DigitalOcean, ServerFlex also supports a pay hourly billing model for your servers.
ServerFlex is simple, reliable, fast and offers locations around the world - we're the AWS of gaming and our growing user base around the world agrees with us!
Happy gaming.
Team ServerFlex.
